CI Insights Setup – Buildkite
Enable Mergify CI Insights and configure flaky test detection using Buildkite.
This page explains how to enable CI Insights for a repository using Buildkite and how to configure repeated test executions for flaky test detection.
Enabling CI Insights for Buildkite
Section titled Enabling CI Insights for Buildkite-
Enable CI Insights on your repositories by visiting the GitHub Integration page (docs).
-
Create an application key with
ciscope as described in the API Usage documentation. This key will be used both for the webhook authentication and for uploading test reports. -
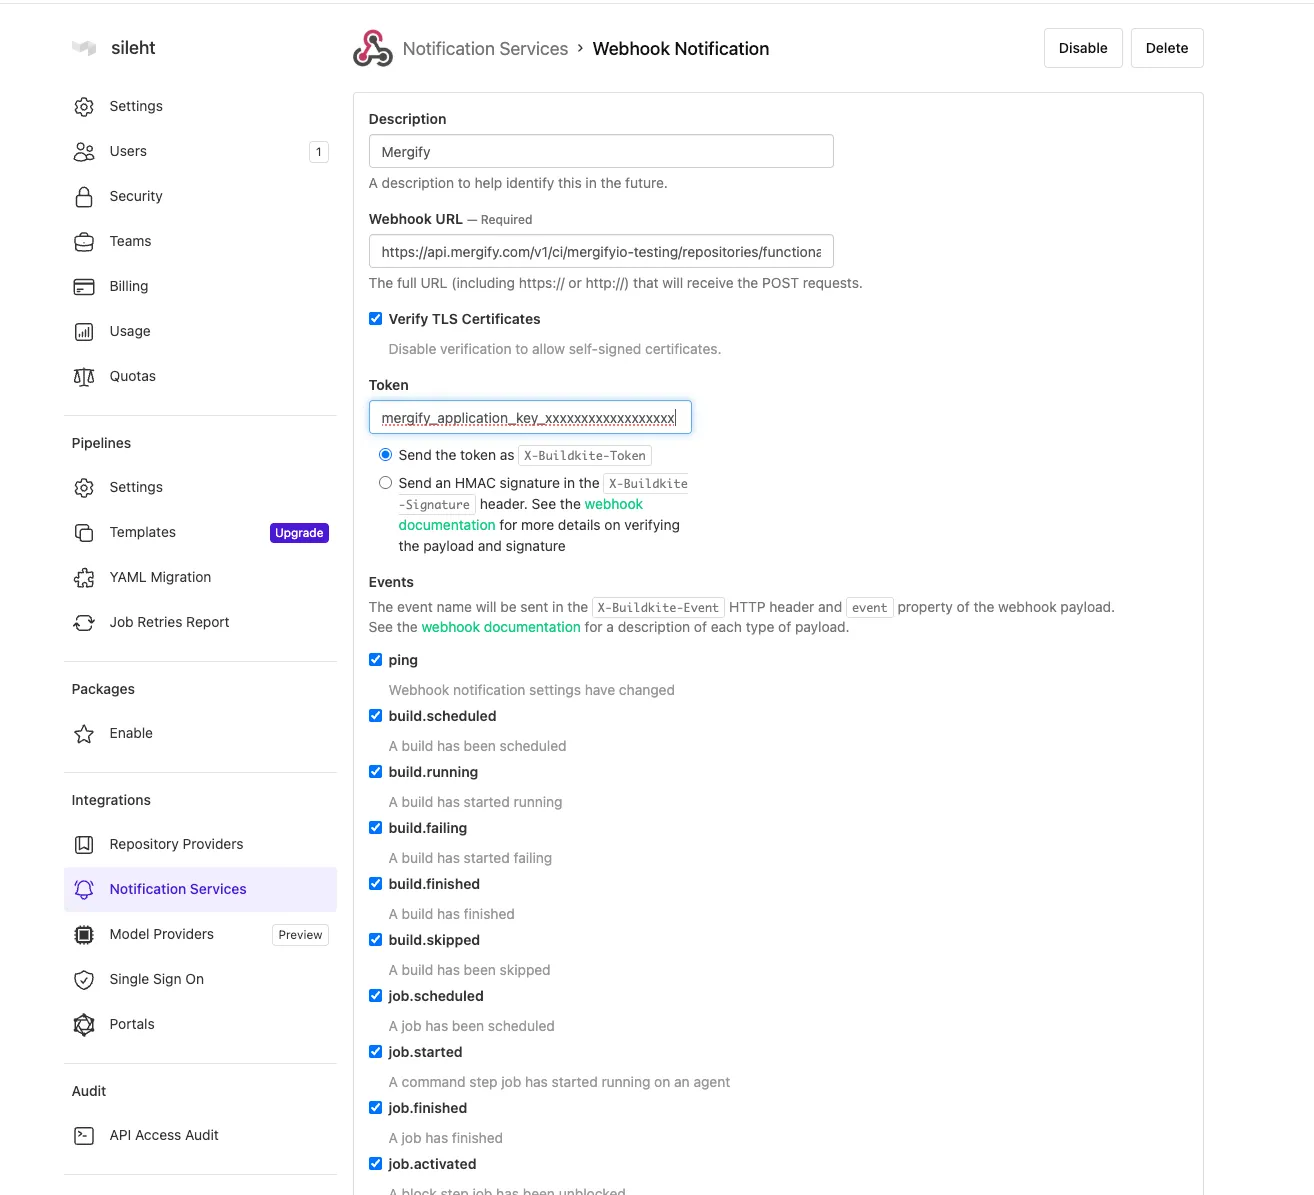
Configure a webhook in Buildkite to send build and job events to Mergify. Go to your Buildkite Organization Settings → Integrations → Notification Services and add a new Webhook notification with the following settings:
-
Webhook URL: set it to:
https://api.mergify.com/v1/ci/<org>/repositories/<repo>/buildkite/webhooksReplace
<org>with your Mergify organization name and<repo>with your repository name. -
Token: paste your Mergify application key and select Send the token as X-Buildkite-Token.
-
Events: enable the following events:
Event Description pingWebhook notification settings have changed build.scheduledA build has been scheduled build.runningA build has started running build.failingA build has started failing build.finishedA build has finished build.skippedA build has been skipped job.scheduledA job has been scheduled job.startedA command step job has started running on an agent job.finishedA job has finished job.activatedA block step job has been unblocked
-
-
Set the application key as
MERGIFY_TOKENin your Buildkite pipeline environment variables. This will be used by the Buildkite plugin to upload test reports. -
Click on
CI Insightsin the Mergify dashboard navigation. You should start seeing your Buildkite job runs appear: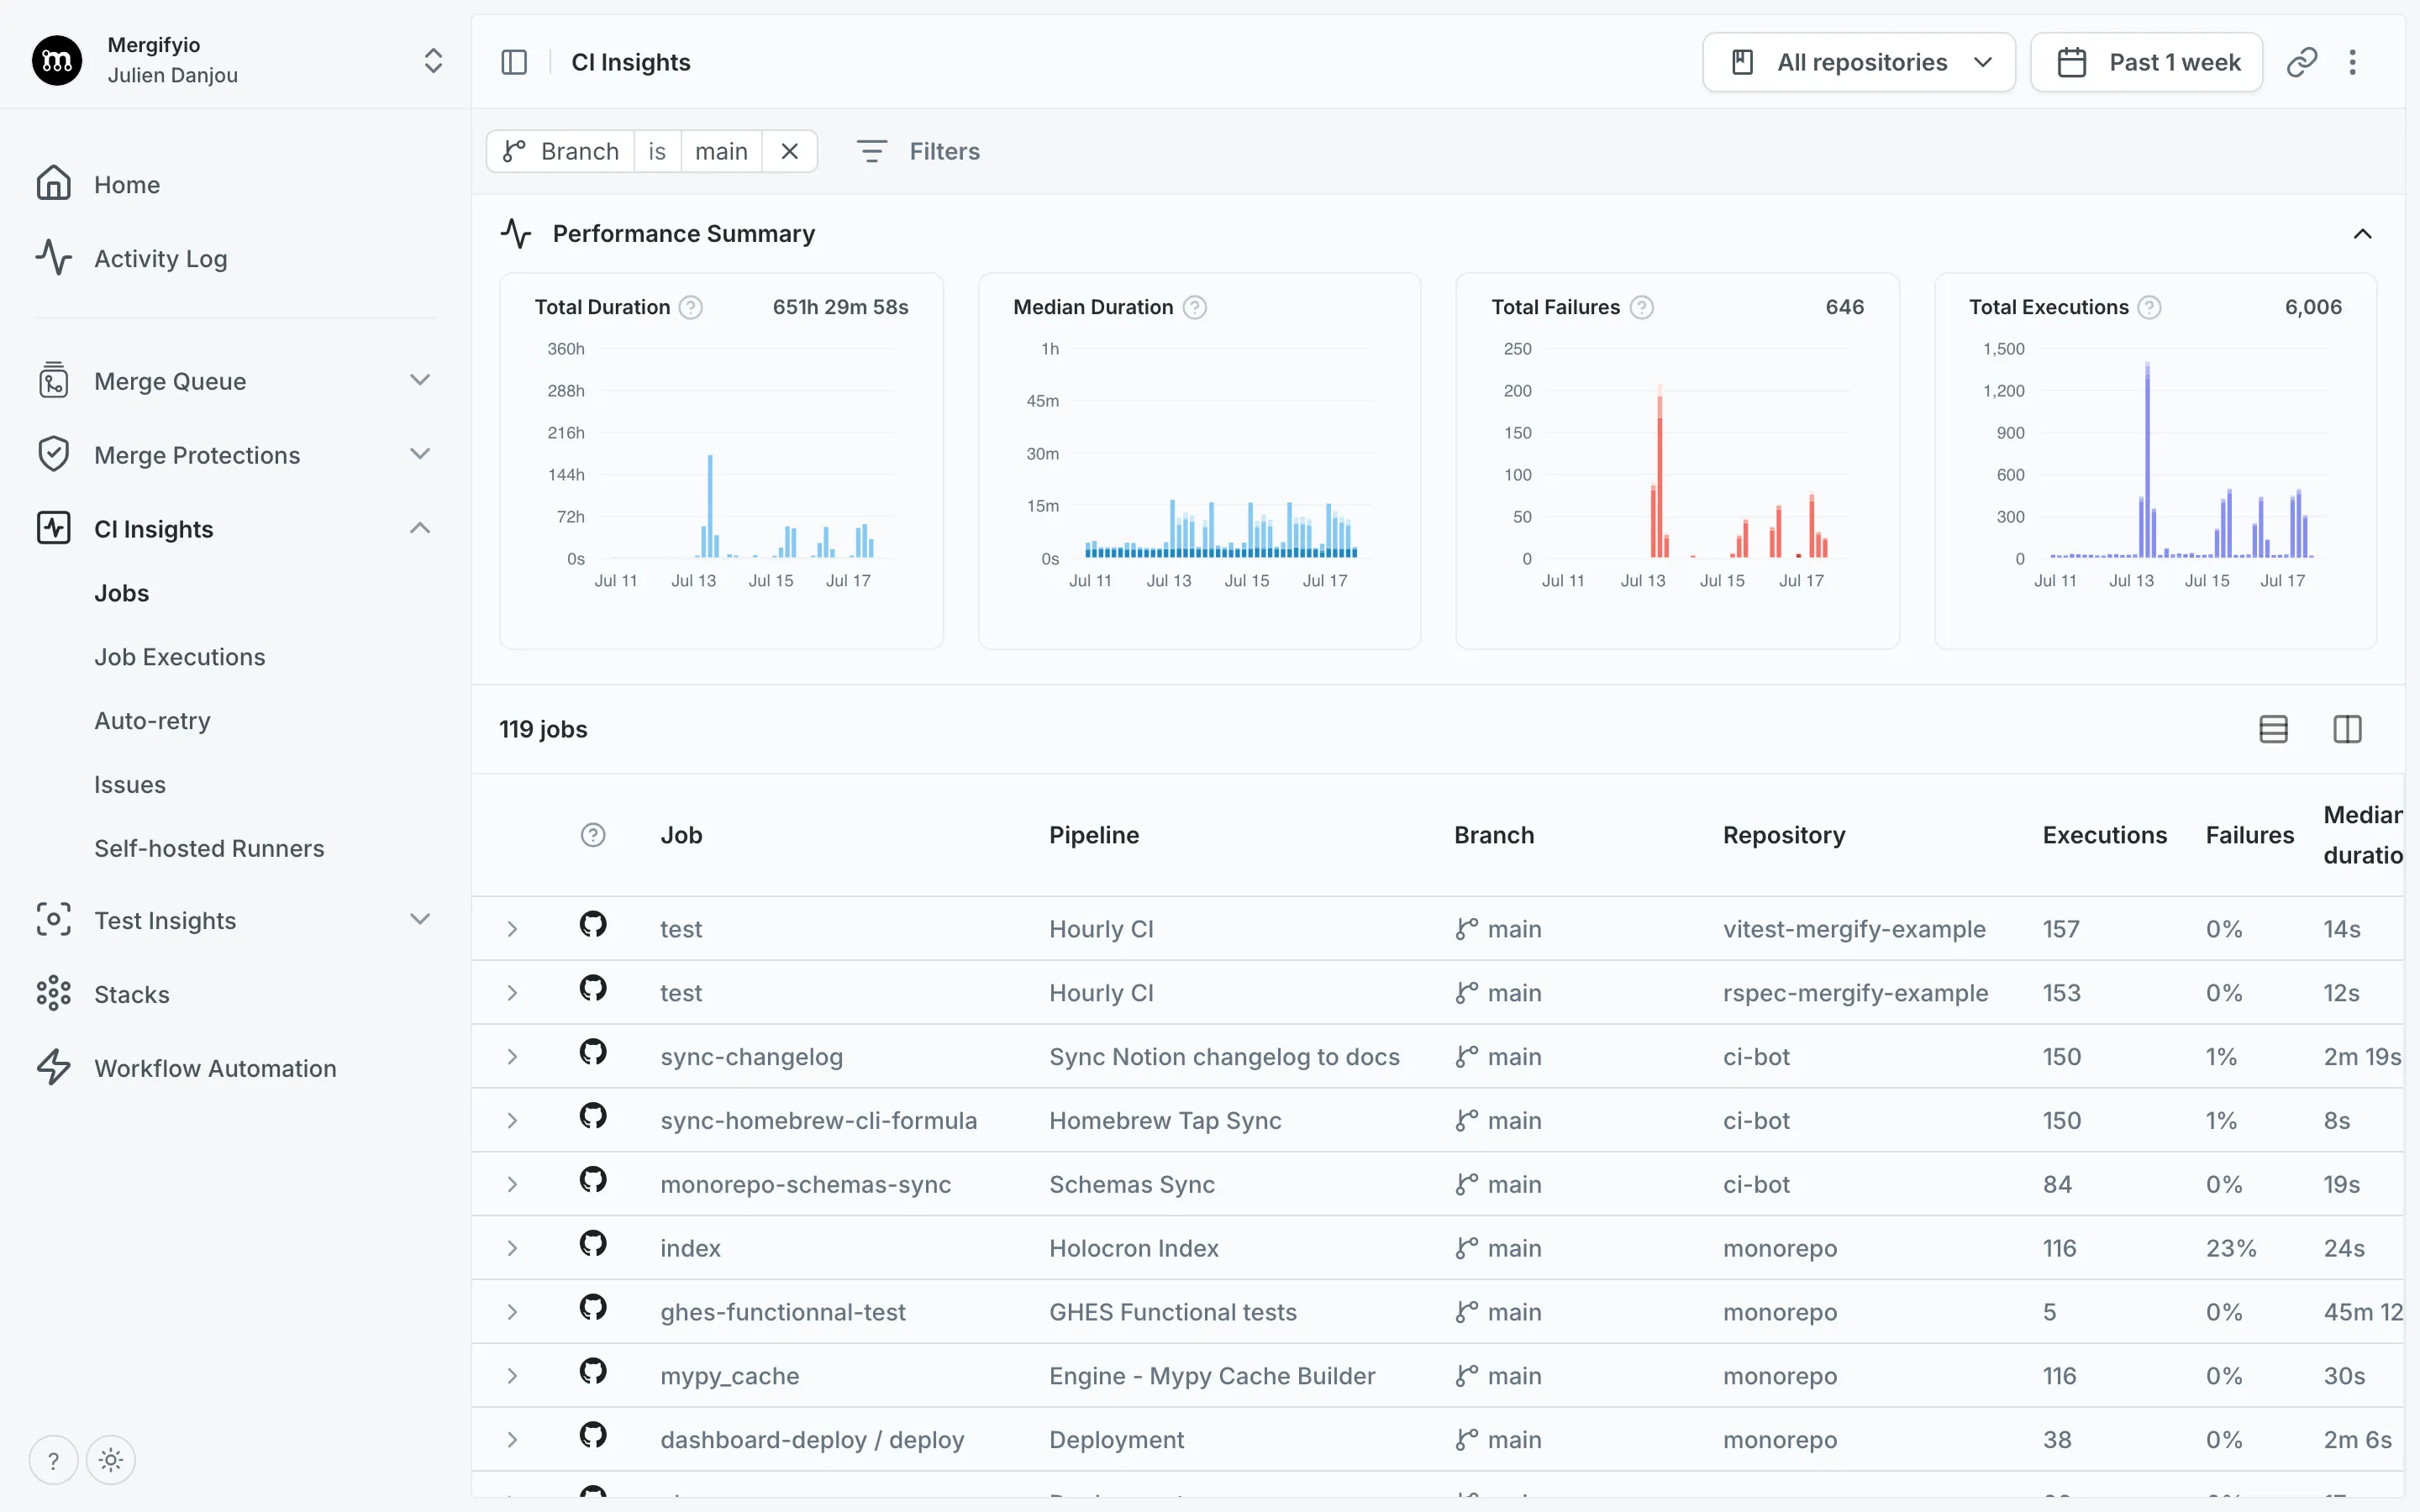
Uploading Test Results
Section titled Uploading Test ResultsUse the mergifyio/mergify-ci
Buildkite plugin to upload JUnit XML test reports:
steps: - label: "Run tests" command: pytest --junitxml=reports/junit.xml plugins: - mergifyio/mergify-ci#v6: action: junit-process report_path: "reports/*.xml" token: "${MERGIFY_TOKEN}"The plugin runs in the post-command hook, so your test command executes first,
then the plugin uploads the results. Even if your tests fail, the results are
still uploaded.
For frameworks with native Mergify integration (e.g., pytest-mergify), you
only need to set the MERGIFY_TOKEN environment variable. No plugin is required.
Setting Up Flaky Test Detection
Section titled Setting Up Flaky Test DetectionTo detect flaky tests, you need to run the same tests multiple times on the same code. This section explains how to set up your Buildkite pipeline for repeated test execution.
Prerequisites
Section titled PrerequisitesBefore setting up flaky test detection, ensure you have:
-
Enabled CI Insights for your repository
-
Created an application key with
ciscope and set it asMERGIFY_TOKENin your Buildkite pipeline environment variables -
Configured test integration for your test framework
Buildkite Setup
Section titled Buildkite SetupUse a scheduled build that runs your test suite multiple times on the default branch. Here’s an example pipeline that runs tests with 5 repeated executions:
steps: - label: "Flaky test detection" command: | set +e failed=0 for i in $(seq $${RUN_COUNT:-5}); do echo "--- Run $$i of $${RUN_COUNT:-5}" pytest --junitxml=reports/junit-$$i.xml tests/ if [ $$? -ne 0 ]; then failed=1 fi done exit $$failed plugins: - mergifyio/mergify-ci#v6: action: junit-process report_path: "reports/*.xml" token: "${MERGIFY_TOKEN}"Configure a schedule in your Buildkite pipeline settings to run this every 12 hours on weekdays.
Configuration Tips
Section titled Configuration Tips-
Frequency: Running twice daily (every 12 hours) provides a good balance between detection accuracy and resource usage
-
Default Branch Only: Focus on the default branch where flaky tests have the most impact
-
Weekday Schedule: Run Monday to Friday to avoid running when no changes are made to the code
-
Job name: Ensure the step label matches the one running tests on your pull request, allowing CI Insights to identify them. It can be overridden with the
job_nameplugin property if needed.
Test Framework Configuration
Section titled Test Framework ConfigurationSee the test framework guides for framework-specific instructions on generating JUnit XML reports and uploading them with both GitHub Actions and Buildkite.
Was this page helpful?
Thanks for your feedback!